This is a month late for the Scenic Route challenge but here is a holiday layout using mostly their products. One of my ScrapbookerOnline buddies Adora was a winner in their challenge. Her work rocks by the way. Her gallery is here.
Tuesday, December 30, 2008
Saturday, December 27, 2008
Some more sketch fun over at Creatively Yours
I've been getting to scrap quite a bit during these long rainy days of Christmas, so here's one I did to start catching up on my Birthday Celebration album.
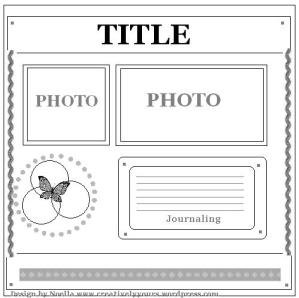
It was taken from sketch #44 at Creatively Yours and converted into an 8.5 x 11 page, which is the size of my birthday album. I like doing birthday pages in a different size, it makes me think differently and i have more fun doing pages that kind of feel repetitive.
Here's sketch #44 -
Tuesday, December 23, 2008
One More Day!
One more day... that was cry heard throughout the house this morning...
and I'm really still not ready.
I can't believe how the days have slipped away. I don't deal well with really cold temps - and I admit I whine and whimper trying to get Steve to do all my little last minute errands.
While I stay inside and play with my paper!
So here is a last minute card (as seen at Scrapperie) to get us all in the mood for a festive and lovely Christmas. When we celebrate the Christ. Have you read the nativity story yet?
Monday, December 22, 2008
Yum!
I'm a guest designer at Creativly Yours sketch blog this month - and so I've been enjoying many of the sketches that are published on the site. Go check it out! This is sketch #43 - very fun!
Here's one of my youngest enjoying the gingerbread house she made at preschool. And she really did eat it down to the graham crackers as soon as I let her at it!
supplies:
Basic Grey background paper
Making Memories snowflake paper
Fancy Pants (old) chipboard flourish - crackled and embossed with silver
Elle's Designs snowflake journaling square and round tag
Paper Shaper snowflake border punch
Hero Arts Holiday Tags clear stamp
Camping Out at School
Earlier in the year, my middle daughter's second grade class decided they would do something different and fun, and they had a camp-out in the multi-purpose room. Any kid with a tent was supposed to bring it in and share with other kids, and they brought sleeping bags and read Henry and Mudge Camp Out. How cool is that for a kid?
So i just scrapped it, and will be sending it in for Becky Fleck's PageMaps contest going on right now!
Sunday, December 21, 2008
Do you like Cosmo Cricket?
Leah Killian is giving away a big bunch of goodies if you leave a comment!
That would be a nice little present, wouldn't it?
Wednesday, December 17, 2008
Decisions, Decisions, Decisions...
Don't you love a good sale and saving money on things other people are paying retail for?
I do.
And here's my tip for the day - head over to Scrapbooker Online and buy whatever you want at 50% off. Wow. Thats the best sale I've been to since Thanksgiving!
I do.
And here's my tip for the day - head over to Scrapbooker Online and buy whatever you want at 50% off. Wow. Thats the best sale I've been to since Thanksgiving!
Tuesday, December 16, 2008
Inspired by a tree
Aren't these trees the cutest things?!
And totally easy to make.
Steps to make these -
1. Cut 4 half circles in progressively smaller sizes. I think the bottom layer might be about 5 inches in diameter.
2. Glue the edges. Don't tape - they'll just pull apart eventually.
3. Stickle. I used deco edges scissors on 1 tree and like that, but stickles does the trick all by itself.
4. Layer. I added a little cotton inside the tips of the layers to get a little height and keep the trees from completely collapsing on top of each other.
And when I had so much fun doing the trees, I thought a card would be totally cute too!
I just folded the edges in and glued to the card instead of together.
I'm not sure it would mail well, but surely I can hand deliver this to someone.
Finally, we have the group of fun things i've got sitting on my computer desk waiting to be given.
School parties are on Friday, and my primary task is to keep the candy in the jar. ha.
Monday, December 15, 2008
Some Tree Trimming from 2007
Well, the dreary weather means this isn't the best photo of my layout, but here are the girls last year decorating the tree.
I didn't even take any pics this year, I just kind of sat back and let them go at it.
And I'm using stash from last year for scrapping. This is Basic Grey Fruitcake on top of the latest Basic Grey, with a Jenni Bowlin die-cut page as well.
Sunday, December 14, 2008
Pringle cans into Cookie Gifts
I just love how these came out!
I made these cookie "tins" from Pringles cans - and they were so easy to do. Plus, they are lined, so the grease from the cookies doesn't soak through and leave marks on the paper.
As I said they were so easy -
here's how:
I made these cookie "tins" from Pringles cans - and they were so easy to do. Plus, they are lined, so the grease from the cookies doesn't soak through and leave marks on the paper.
As I said they were so easy -
here's how:
- wash and dry the cans
- cut 12x12 paper to size so that it slighly overlaps
- Mod Podge the paper and then press firmly until the paper sticks to the can.
- Set aside and let dry for a while - you can start on the lid while you wait.
- using a template, outline an oval on the opposite side from your paper seam.
- cut out using craft knife
- Cut a larger square piece of transparency and adhere it to the inside of the can. I used Zip Dry glue and it worked great.
- Add embellishments. I used Zip Dry again - that stuff really sticks and it will hold the seams together for a long time. I've found tape adhesive usually pulls apart after a while.
(you could probably change the order of the steps and add the transparency to the outside of the can, under the paper. I decided it was hard to cut the circle twice so that's why i chose this method.)
Friday, December 12, 2008
Photoshop Fun
I have been playing with actions and frames again.
I used Midnight Action by Dave Jaseck for these. It gives a very vintage feel. I usually crop and light the photo first then apply the action.
Then I added a Sandi Krieger frame to the bottom one. I'm looking forward to playing with these and making some vintage looking pages.
Thursday, December 11, 2008
another Christmas card
Another fun card this week!
Here I used some Basic Grey paper, MME polka dot, and a Jenni Bowlin bingo card. Have you seen these? She has several different types and all so cute!
I also Stickled the snowflakes cut out from MME patterned paper and stamped that circle tag.
Wednesday, December 10, 2008
Step it Up Christmas cards!
Here ya go -
I did this very simple card for a class last week, and then thought it would be fun to see how I could bring it up to full Christmas glory.
So here is the basic card, with Graphic 45 patterned paper and some red grosgrain. Digital image of Santa is by Katie Pertiet "Posted Santa" at Designer Digitals.
Next I changed out the ribbon, added a black scalloped edge to the front (punch by Stampin Up) and added some black matting for pop. The black ribbon really adds some pop now.
Finally, then, we have the kitchen sink version, with all of my favorite things - lace from Melissa Frances, a little more patterned paper and ribbon, a cut out soldier popped up, buttons and flowers from BoBunny. Maybe too much for your mass-production kind of card but I have some great friends this would be perfect for.
Hope you enjoyed it!
Leave me a comment if you liked this step-it-up. I have another card I'm going to try this on. So stay tuned!
Tuesday, December 9, 2008
Christmas Cards!
How fun is Gingerbread?! I picked up this Martha Stewart felt roll of Gingerbread men and just love how many things they work with. This is the first of several cards I'll be posting over the next weeks.
Check back tomorrow for a "Step-It-Up" project, where I take a simple card and then kick up the volume on the embellishments for two more looks. Can't wait to see what you think. Please leave a comment for me!
For more Christmas Card fun, check out the Scrapperie's Christmas Card A Day forum. There are so many really great cards posted, I think you'll love them.
Tuesday, December 2, 2008
Have Yourself a Merry Little S'More Guy
Isn't this the cutest little S'More guy you've ever seen? We made these at dd's birthday party this weekend from an Oriental Trading co kit. And if I hadn't needed to have multiples, I might have tried to do them on my own. Really makes me want to do something crafty with marshmallows. (oh, the kit came with styrofoam mallows). What you don't see are the cute little carrot nose and the buttons that complete the look. very cute and we'll have fun hanging these up on the tree soon.
Easy gifts
This idea came from a link I saw at SBO - and I loved the simplicity and that it was perfect for Christmas gifts for my ladies Bible study group. The original was a holiday planner and what a great idea that is too. I may make some more of these because we have lots of file folders and I also tend to have lots of spare patterned paper. This project takes 2 sheets of 12x12 - you won't use all of it, and a file folder, some ink and a corner rounder if you like that look.
Subscribe to:
Posts (Atom)